
Why are fall throw pillows so expensive? Let me show you how to DIY your own cozy set of fall throw pillow covers on a serious budget!
Nothing says cozy like throw pillows and fall so you can’t lose when you mix the two together, right? Toss a few fall throw pillows around and your home will be instantly transformed for the upcoming season.
One of my favorite holiday decorating hacks is utilizing pillow covers! They take up less room in storage and are a heck of a lot cheaper. Which is why I decided to make my own fall throw pillow covers! I followed similar steps to when I painted a few pillows last month which can be found here.
Pillows can be really expensive for whatever reason and I don’t think getting festive for fall should cost you an arm and a leg! Pillows are one of my many decor weaknesses which is why it didn’t take me too long to DIY my own fall throw pillow covers. They are so easy to make and way cheaper than most fall pillows I’ve seen in the stores lately.
This Post is all about DIY Fall Throw Pillow Covers!
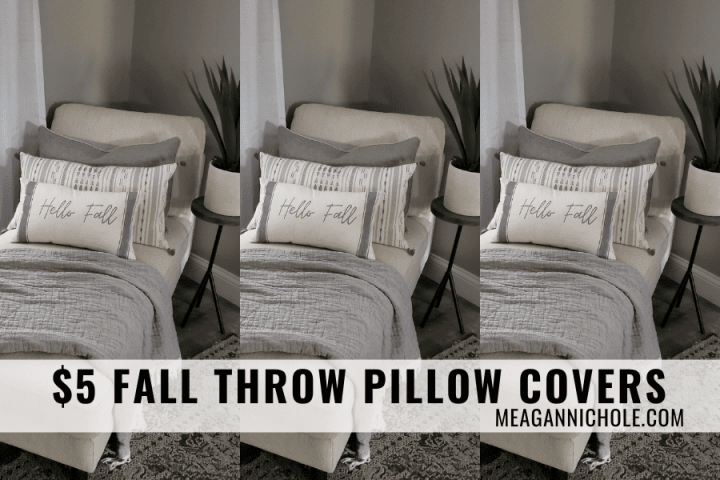
Pin it For Later

Materials for these Fall Throw Pillow Covers
**I purchased my pillowcases and inserts from Amazon but this DIY works for any pillowcase and filler.
- Pillowcases – I love how versatile this lumbar shape is
- Pillow Inserts or Filler
- Acrylic Paint
- Cardboard or scrap paper – to insert in pillow case to prevent paint from bleeding through
Instructions for Fall Pillow Covers
Prep Pillow Covers

There are a few things I suggest doing to prep your pillowcases before you begin painting your pillows. I highly suggest washing and drying your pillowcases to avoid shrinkage later. This way you are painting the pillowcase at the size it will most likely stay. If your pillowcase has a zipper, be sure to zip it closed before washing.
My pillowcases were pretty wrinkly after I pulled them out of the dryer so I flipped them inside out and quickly ran the iron over them. It’s easier to iron or steam your pillowcases before painting them. I swear I get my iron out for the blog more than I do for my wardrobe.
The last step before you get to the fun part is inserting a few pieces of cardstock, newspaper, or cardboard inside your pillowcase. This will help prevent paint from bleeding through to the other side.
That’s it!
Paint Pillow Covers
Now for the fun part! Painting pillowcases isn’t much different than painting canvas or paper. Practice your design on paper and then paint the design on your pillowcase. Easy peasy! You can use stencils, stamps, or freehand them if you wish. Just remember fabric with larger threads such as burlap, will make it trickier to paint smoother lines, so go slow at first and use a skinny brush. I pulled up my canva app for inspiration
Do I need to use fabric paint?
You can absolutely use fabric paint for this project, but I didn’t simply because I don’t have any. For once, I didn’t feel like it was necessary to purchase fabric paint or fabric paint medium for just one small project. I have tons of acrylic paint and I know it sticks to fabric. Just look at the clothes in my closet!
If you use fabric paint or medium, your painted design will most likely lay softer on your pillowcase, but I found the loophole by washing and drying my pillowcases a few times to help soften them.
How I Painted my Farmhouse Stripes

I call these stripes my farmhouse stripes and they are so easy to do! As you can tell in the photo above, all you need is some tape and paint.
Start by creating your center line first by placing two pieces of tape about 1 to 1.5 inches apart (I used the width of a ruler) on both ends of the pillow. I used extra long pieces of tape so I could hold the cover in place by sticking the tape to the table. Be sure to firmly press down the tape before painting. Then take your brush and gently paint the open space and remove the tape.
Let the center stripe air dry or speed up the process by laying it in the sun or under a blow dryer. Once the center stripe is dried, it’s time to make your skinny outside stripes. Start by laying a piece of tape about a 1/4 of inch away from the center stripe on both sides. Then make the space even smaller by laying a piece of tape on top of the center stripe as you see in the photo above. Be sure to firmly press down the tape before painting. Then take your brush and gently paint the open space and remove the tape.
That’s it!
Wash and Decorate with your Pillows
Let your pillowcase dry for a day and then toss it in the wash one last time. I am going for a more worn look, so I plan to wash mine a few times before displaying them. If you want to protect the design, flip the pillow case inside out before washing.
Now it’s time to decorate! I keep moving my fall pillow, but I think I will leave it on the lounge chair in our entry room. This lumbar size is a fun shape to decorate with.
Share your DIY Fall Pillows
As always, thank you for following along with me in my creative journey. Be sure to tag me and use #meagannicholedotcom when sharing your fall throw pillow covers! Thanks for stopping by MeaganNichole.com
DISCLAIMER: Links included in this description might be affiliate links. If you purchase a product or service with the links that I provide I may receive a small commission. There is no additional charge to you! Thank you for supporting, so I can continue to provide you with free content each week!
Latest from the Blog
How to Organize a Small Closet with a Lot of Stuff
Learn how to organize a small closet with a lot of stuff with these simple but practical organization tips and tricks! Does your closet resemble Monica’s secret closet on Friends? It’s okay! I am here to help you! Alex and I love our home, but our closets could be bigger. So, I have been forced…

What does Double Stuffing Balloons Mean and What’s the Point??
Learn why Double Stuffing balloons is so useful when it comes to designing your own balloon garlands and custom balloon decorations. I came across the “double stuffing” method when I was searching for a specific dusty blue color for my son’s first birthday balloon garland. I found the perfect dusty blue balloon kit on Etsy,…

DIY Wood Stain| How to Make Wood Stain with Acrylic Paint
Check out this tutorial to learn how to make a DIY wood stain using only two things: acrylic craft paint and good ol’ water! That’s it! Unless your are re-staining your deck, you never have to purchase stain for a craft project ever again. I discovered this out of necessity a few years back and…
Leave a Reply