
What better way to decorate your home than with photos of your friends and family? Let me show you how to do your own photo transfer the right way.
Have you ever wanted to have some of your favorite photos printed on wood, but didn’t want to spend the money? I’ve seen DIY photo transfers on Pinterest for years but thought it was too good to be true. I didn’t understand how I was going to get a photo onto wood and make it look nice enough to display. Then, by happy accident, I discovered Mod podge photo transfer medium at Hobby Lobby! You guys, it’s shockingly easy! The hardest part is waiting a few days for your image to fully transfer. With this photo transfer method, you can easily fill your home with your favorite photos while staying on budget. Let’s get to transferring, shall we?!
Do you remember my reversed canvas tutorial? How cool would it be to combine this and my reversed canvas?! Let me know if you try this! It would make for a beautiful DIY gift for someone. Maybe as an engagement or wedding gift? I know I would love it!
This post is all about how to do a photo transfer the right way!
Pin Photo Transfer for Later
Materials I used for this Photo Transfer
- Photocopy of an Image
- Mod podge photo transfer medium
- Framed wood canvas like these
- Paint Brush
- Scraper or credit card to smooth out bubbles
- Sponge or Wash rag
Photo Transfer Instructions
How to choose your Material and Photo
To begin, you need to decide what material you want to transfer your photo to and what image to use. I have tips for both! This photo transfer method will work on wood, canvas, and fabric. It will not work on glass.
Material
When choosing your material, I would suggest going with something lighter in color so your photo will show up. Your image still may be able to show up if you use a darker material since the medium drys white, but I’ve never tried it. I used a premade wood canvas from Hobby Lobby for this photo transfer project. I chose a wood canvas because the wood grain adds a cool texture to the image and knew I could start my project over by sanding it if I completely messed up.
Photo
When choosing your image, choose one that doesn’t have a lot of important detail. This way you don’t have to worry about ruining the image if you accidentally rub a piece of the photo off of the wood. For example, if you are using a close-up shot of someone’s face and rub off their eye, it ruins the photo. Wouldn’t you agree? This DIY isn’t hard but requires practice if you want to use a photo with finer detail.
Create a Photo copy

In order for the photo to transfer, you must use a photocopy. This step is very important because the glossy texture on an actual photograph will keep the image from transferring. If there is text in your photo be sure to reverse the image before printing it so the text will display correctly once transferred to the wood. Once the copy is printed, cut it to the size you need.
Apply Photo Transfer Medium

The Mod Podge directions say to apply the medium to the image side of the photocopy, but I applied it to my wood frame instead. I don’t think it affected my results and it was easier than applying it to the flimsy paper. You do you :). You want to apply enough of the medium so that you can’t see the surface underneath it.
Place the photocopy face down onto the surface and smooth it out using something flat like a scraper or credit card.
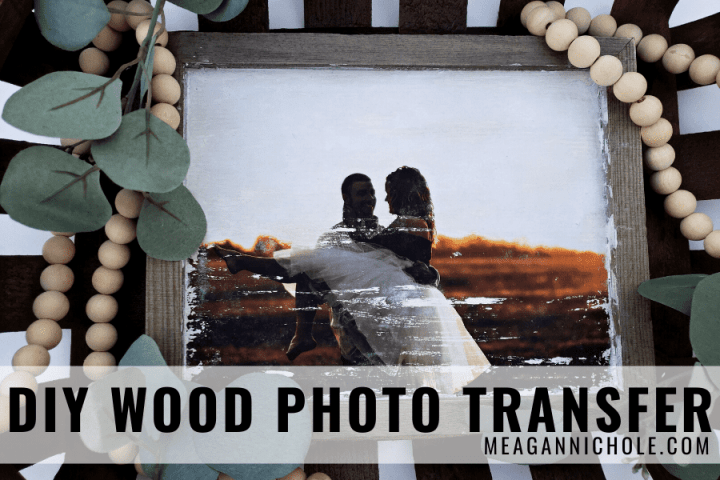
** Learn from Meagan Tip: Just a heads up, the transfer medium doesn’t dry clear! See how my frame looks like it has white paint all over it? Maybe that’s why you are supposed to apply the medium directly to the photo.
Remove Paper and Repeat

Now is the hard part. You have to be patient and wait 72 hours before the next step. Seriously, leave it alone! I know Mod Podge suggests 24 hours, but I found more time makes the next step so much easier! The photo needs to fully transfer for this DIY to work.
Once it has dried for 72 hours, take a damp sponge or cloth and wet the back of the photocopy. Using your finger or the sponge, gently start rubbing the paper away. This part requires some trial and error, so go slow and experiment with different levels of pressure. The paper will come off in multiple layers, so let it dry after the first layer seems to be removed. Repeat these steps until all of the white paper “fuzz” is gone.
Remember when I suggested a less detailed photo? You will most likely rub parts of the photo off in some areas by accident your first time doing this project. It’s okay! This can add a cool vintage vibe to your project, but can also ruin it if the wrong part of the photo is removed. This is why I chose to use a wooden frame, so I could sand it off and try again if necessary. I personally liked the way it looked.
Once you have completed the removal process, you are ready to display it! You may want to add a clear coat to keep the image intact.
Free Decorating Guide

Want some more decorating inspo? Snag my FREE decorating guide to help you make your home a space you can be proud of! This guide take you through my simple process of decorating.
Click here for your FREE Decorating GUIDE
Share your Photo Transfer
As always, thank you for following along with me in my creative journey. Be sure to tag me and use #meagannicholedotcom when sharing your photo transfer projects! Thanks for stopping by MeaganNichole.com
DISCLAIMER: Links included in this description might be affiliate links. If you purchase a product or service with the links that I provide I may receive a small commission. There is no additional charge to you! Thank you for supporting, so I can continue to provide you with free content each week!
Leave a Reply