
Add a modern farmhouse touch to your fireplace with this super easy reclaimed barn wood mantle tutorial.

Fireplaces are like snowflakes, no two are alike, and that goes for fireplace mantles too. When we bought our fixer-upper at an auction (if you are new, read the full story here) I was thrilled to have a fireplace to decorate, probably more excited than having the occasional fire! The original mantle was adequate, but it sat too high for our giant TV (marriage = compromise.. the TV was not my choice), and not the style we wanted. So, it was taken down during the demolition phase of our remodel and our fireplace sat naked for what seemed like an eternity.
Finally, 10 months later, we took the time to build and hang this reclaimed barn wood mantle! Our new and improved mantle is made of reclaimed wood from one of the barns on our property. I love that the mantle holds a little bit of history from our home and tells a story.
Here’s a photo of what our living room looked like the day we bought it. Looks like a completely different place.

Pin my Reclaimed Barn Wood Mantle Tutorial For Later

Supplies for Reclaimed Barn Wood Mantle
- Barnwood – we used rough cut oak
- Measuring Tape
- Saw Horses
- Circular Saw
- Speed Square
- Sawzall
- Palm Sander or Sand Paper
- Stain – We used a MinWax Gel Stain
- Paint Brush
- Wire brush
- Lint Free Rag
- 4 Inch Screws – depends on the thickness of your board
Instructions For Reclaimed Barn Wood Mantle
Planning Phase
If you are stuck on what mantle to go with, consider something in contrast to your fireplace. We loved the natural look of the unstained rough cut oak board we were using, but it blended too much with the stone on our fireplace. So, we stained the wood and it turned out beautifully! I was afraid staining would take away from the character of the wood, but it ended up adding to it.
Choosing the Right Piece of Barn Wood

If you are choosing from several pieces of wood, take some time to choose the right one for your project. We were looking for a piece with character, but also straight enough to function as a mantle. To check the straightness of your wood, stand at one end of the board and look down the edge.
Measure + Cut

TRUE STORY! We had to cut, sand, and stain two pieces of wood because one of us (probably me, not the hubs) measured above our fireplace incorrectly. Measure twice, cut once! Measure and remeasure the top of your fireplace. Learn from our mistakes! We wanted the mantle to hang over the fireplace, so we added an extra 5 inches to both sides. This would give us enough room for the pilasters (the end pieces or legs at the bottom) too. Consider the thickness of the wood you are using to make sure you have enough space for your TV. This is another thing we messed up. Luckily, Alex was able to drill a few more holes in the TV bracket to raise it higher. Once you know the length you need, cut the board to the proper length using a circular saw.
Our fireplace is 60 inches wide and we made our mantle 70 inches long.
Pilasters (legs)
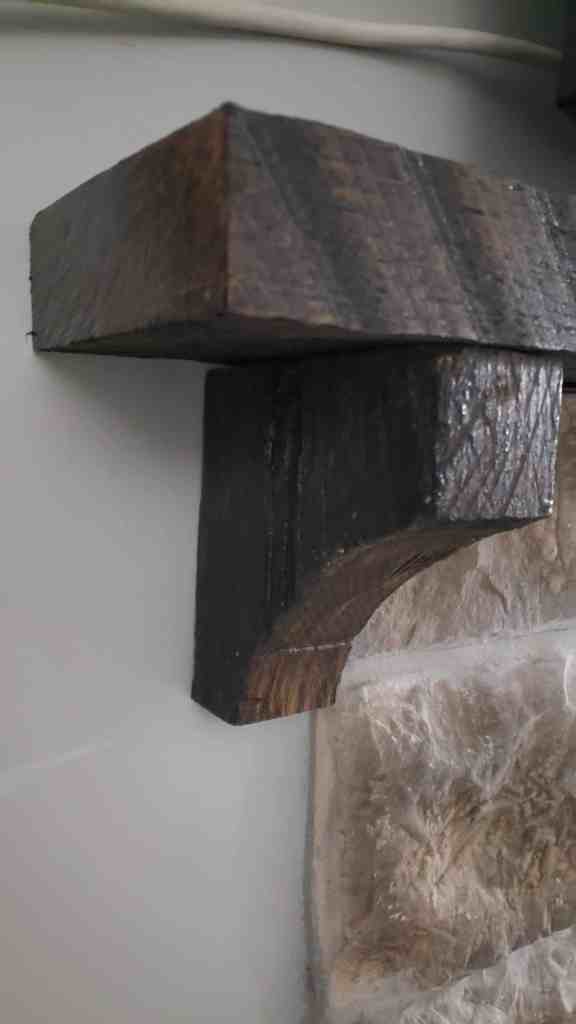
Use the remainder of your barn wood to cut out pilasters or legs for your mantle. This is purely decorative but adds a nice finishing touch to your fireplace. We started by cutting two squares (5.5″ x 5.5″), then used a sawzall to cut out a radius in each square.
Sand

Don’t roll your eyes at me! I’m not a super fan of sanding either, but this is a quick and painless sanding job. Especially if you have a palm sander! To preserve the character of the wood, we lightly sanded the entire board with 180 grit sandpaper. If you are a sandpaper newbie, see my grit chart in the next section. Sanding the wood will remove splinters, and open the pores of the wood to absorb the stain. You don’t have to be super thorough with your sanding, it’s not like you will be sitting on your mantle. We only went over the board two times total. See? It’s not so bad!
Sandpaper 101
Thanks to https://www.designsponge.com/ for this helpful infographic.

Stain

For this project, we used a gel stain because it tends to be more forgiving. Using a wire brush and lint-free rag, remove all sawdust and dirt from the board. Once your stain has been thoroughly stirred, start applying the stain in the same direction as the grain of the wood. You can use a brush or an old t-shirt to stain the board. I recommend starting on the bottom of the board to test your color and application technique first. Continue wiping the board until the stain has been absorbed. If needed, apply more stain until the entire side is covered. Occasionally check edges for drips or runs and wipe as needed. Let the stain dry to the touch before moving to the next side. We only used one coat for this project but add another coat if you are seeking a darker shade.
Stain your pilasters with the same technique.
You should probably let the wood dry overnight, but you can usually get away with installing your mantle just a few hours later. I never claimed to be a professional, so I can give you my honest opinion. I hate waiting for things to dry!
Installing the Mantle

This is the most exciting part! I’m not going to lie, Alex did this part. I played a very small role in the installation process, holding it in place. We used 4 4″ screws to secure the board to the wall. First, mark out your studs so you know where to place your screws. Then, pre-drill your holes on the mantle to prevent the board from splitting when driving the screws through it. Have your helper hold the mantle in place with a bubble level on top. After its level, you can begin inserting screws through the holes you pre-drilled. Insert screws on each end and then work your way to the center of the mantle.
Enjoy Your Mantle

Now it’s time to decorate! Our TV doesn’t allow for much (okay, any at all) decorating on the top, but I still have full intentions of hanging banners for the holidays and special occasions. I use the small clear command hooks when decorating. They are my favorite decorating hack! I think they might be Alex’s favorite too.. less unnecessary holes!
Share your Reclaimed Barn Wood Mantle with Me
As always, thank you for following along with me in my creative journey. Be sure to tag me and use #meagannicholedotcom when sharing your reclaimed barn wood mantle projects! Thanks for stopping by MeaganNichole.com
DISCLAIMER: Links included in this description might be affiliate links. If you purchase a product or service with the links that I provide I may receive a small commission. There is no additional charge to you! Thank you for supporting, so I can continue to provide you with free content each week!
Leave a Reply