

It’s the most wonderful time of the year! However, it can quickly become stressful if you let it! Decorating your entire house to bring your family joy and Christmas cheer can sometimes leave us feeling overwhelmed and defeated. Well, I am here to help! People often ask me to help with their decorating, and as much as I would love to come over to each and every one of your homes to help, there’s just not enough time. So this is my way to help… virtually! If you have ever felt overwhelmed when decorating for the holidays or found yourself blowing your budget way too quick, this guide is for YOU! Let me show you how I decorate for Christmas. Everyone deserves to live in a festive space! Let’s get to it!
Step 1: Check Inventory
Before you go shopping for new holiday pieces, shop around your house first! Bring out the Christmas totes from the basement and take a walk around to see what everyday staples you can repurpose. When I decorate for Christmas, I reuse pillows, throws, lanterns, baskets, vases and candleholders. Learn from my past mistakes, every piece doesn’t have to say “Merry Christmas” or have a Santa on it for you to successfully decorate for Christmas!
Step 2: Plan Your Zones
If you are just starting to decorate for Christmas, focus on 1-3 zones for your first season. Choose your zones by where you frequent the most, the space you see first, or where you host. All homes are different, so choose what makes sense for your space. Consider starting with your Christmas Tree, front porch, entryway, above the kitchen cabinets, or the fireplace / TV area. There are no rules on how many rooms you must decorate to be festive. You can start and end in one zone. It depends on what brings you the most joy. You may choose to start and end with your Christmas tree. Totally fine! It’s your space!
Christmas Tree
The Christmas Tree is at the top of the Christmas decoration food chain! Not that you need my permission, but you can start and stop with the Christmas tree if you’re not into decorating! However, if you want to add more décor, read on.. Your tree sets the tone for the rest of your holiday décor, so I recommend starting with it first. I love how unique everyone’s trees are. They are like snowflakes, no two are alike. If I had to name the tone or vibe of our Christmas décor, I would have to call it “Classic-Vintage-Rustic”.. Yes, I just made that up!
Our Tree

Our tree is a hand-me-down from my in-laws that we’ve had since our first house. It’s pre-lit with colorful lights, but I prefer white, so I string them on every year. If it wasn’t such a beautiful tree, I would replace it, but I know it would be pricey to do so. If you have to string your lights onto your life-like (Mr. Christmas says you can’t say fake) tree, I recommend adding as you stack your tree together. Also, don’t forget to fluff! This will make a world of difference. think “two out, and one up”, when separating the branches.
Our Tree Skirt

Our tree sits pretty low to the floor, so I fake the skirt by shoving a piece of Christmas-y fabric I found in the discount bin at Hobby Lobby a few years ago. Money saver!
Garland

Before hanging our ornaments, I drape a strand of Christmas-y ribbon and a few strands of red wooden beads on the front of the tree by following a zig-zap pattern. This helps fill the holes in our tree. When hanging garland, make sure it drapes between branches and doesn’t go straight across.
Our Ornaments


I prefer mismatched ornaments for our tree. Each ornament has a story. I have ornaments made by our nieces and nephews, ones from our childhood, ones from my parents’ collection, and some to commemorate our wedding. When placing ornaments onto the tree, I place 3 at a time and step back to make sure I’m not leaving any areas empty.
Topper

I finally purchased a legit topper last year. I could never find one that was just right for our tree and scored this beauty at Home Depot after Christmas last year! Prior to this year, I used a DIY star made out of skewers and twine.
Front Porch
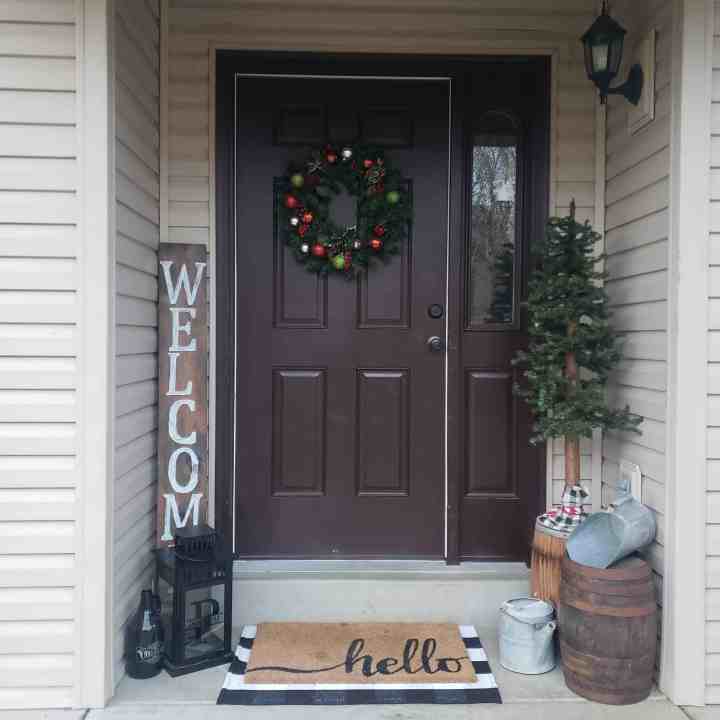
After the tree, I usually focus on the front porch because it’s the first place my guests see. It doesn’t take much. Take a look at the picture above and notice how I mix my everyday and Christmas décor together. I am only using two Christmas pieces. Our new house has more space, so a lot of my porch decor made it’s way inside. However, I think our front porch still looks festive enough for our guests…. and our Amazon delivery person.
Repurposing is a reoccurring theme with our house… and in this post. Take a look at your current décor and decide what you can add. Have a bench? Add some pillows. Have a wreath? Attach some ornaments. Or may I suggest one of my DIY wreaths? I have a tutorial using greenery, one using wheat, and this hoop wreath I made for under $10! Have a basket, bucket, or pitcher? Add a mini tree, red berries, or some ornaments.
Entryway


Everyone’s entryway is different. For smaller entryways, go with a wreath for the back of the door and maybe a lantern full of ornaments or fake snow and bottlebrush trees. If your entryway is large enough that you have a table or bench, I suggest adding a few Christmas pieces to your current décor. Check out my entry table.
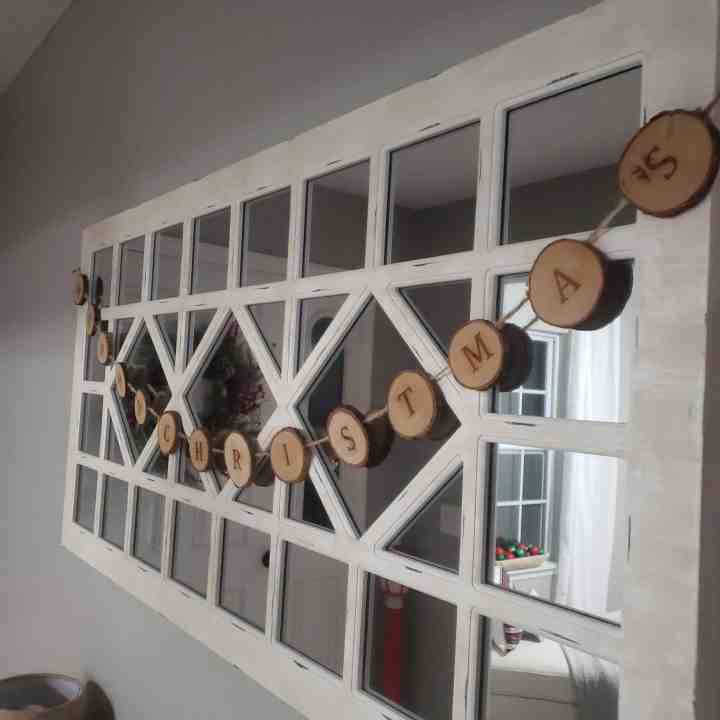
Kitchen Cabinets

This is potentially the easiest place to decorate depending on your style. If there is space above your cabinets, may I suggest adding a Christmas garland? It’s a quick and easy way to add some Christmas cheer to your kitchen! Garland is the only thing I add to my kitchen to avoid cluttering up precious counterspace. I added the ornaments and pinecones using twine and fishing line.
Fireplace / TV Area

Your fireplace or TV area is a great place to focus on. Our first home didn’t have a fireplace or an entryway, so my entry table mentioned above was positioned under our TV. Whatever your situation is, this area is a great place to warm up for the season. We have yet to build our mantle, but that didn’t stop me from cozying up the space. Want to know a secret? That gift on the right is fake! They are just empty Amazon boxes. I needed something with height, but didn’t have anything. I hope to replace it with a small decorative sled next year!
Centerpiece
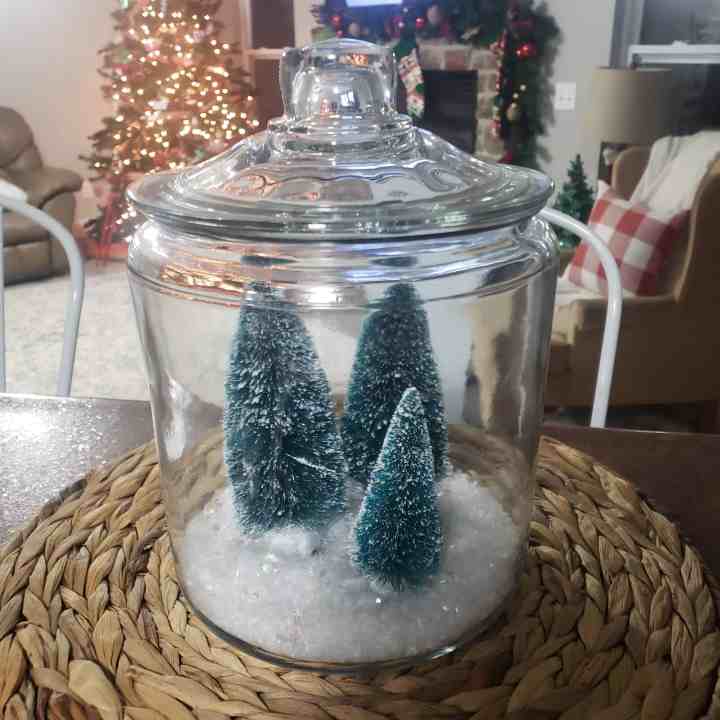


A Christmas centerpiece is a great way to add some Christmas cheer to the table or countertop. This could be a DIY faux flower arrangement, a basket (or a dough bowl like mine) full of ornaments or a jar full of fake snow and bottle brush trees.
Step 3: Pinterest It!
Now that you have taken inventory on what you have, chosen a few zones to focus on, let’s go to Pinterest. Start a new board and go to town. Pin like crazy! Search for spaces similar to the zones you are looking to decorate. This is our first Christmas in the new house and I’ve never decorated a fireplace before, so I searched “dark fireplace Christmas décor” to inspire me with new ways to decorate the space. Go nuts and pin like crazy! Now take a look at your board. Is there a theme? Similarities? Do you gravitate towards neutral décor, classic green and red, or something different like blues or pinks? There are no rules when it comes to how YOU should decorate for Christmas. However, it is helpful to have a style or vibe when shopping for new items. While you are scrolling, check out my pinterest page.
Step 4: Go shopping!


I know you are itching to get to Hobby Lobby, but I promise a trip to the Christmas Aisle at Dollar Tree and Walmart is worth it! I like to hit up these stores first to snag up all the fillers I see, like ornaments, faux snow, wooden pieces I could paint, and so much more. Remember, you can always spray paint something to match your theme. Trust me, a decoration from DT or WM and a can of spray paint will cost less than the décor you see at any craft or home décor store.
What to Buy
Pillow covers and Throw Blankets


To avoid storing a ton of accent pillows, purchase a few Christmas pillow covers instead. Throw them over your current pillows and you are good to go! I have discovered pillow covers to be a lot cheaper than pillows too. I bought this 4pack from Amazon and paired them with my everyday pillows.
Do you have the same blanket problem I do? You buy all of them!? Aim for the neutral colors next time, that way the throw can double as décor for a cozy Christmas display. I snag discounted and soft ones at places like TJMaxx, Home Goods, and Ross. I really like this one from Amazon too. Have any blanket scarfs? Stage them as a blanket with your holiday décor like I did in the photo above.
Filler Ornaments

Walmart starts selling Christmas décor as early as September. Be sure to snag a few boxes of filler ornaments (aka: solid round ornaments).
There’s always a place for them and they’re usually under $5 for a multi pack! Throw them in a basket or bowl, use them as a lantern filler, or place them along your mantle with some greenery. What if your the container has a few colors that clash with your décor? Spray paint them!
Garland


As mentioned before, garland is the perfect way to add some Christmas magic to your kitchen cabinets. It takes just a minute or two to display and no other décor is required. You can always look into a DIY version like mine too! I use different garlands all around our house. I am little bit obsessed.
Step 5: Take Pictures!
Once you have your zones looking festive and cheerful, be sure to snap a picture. I learned this hack from my Mama. Pictures will make it a lot easier to decorate for Christmas next year. Even if you like to change it up, it will give you a great starting point. I guess I will just pull up this post next year!
Step 6: Store it!
Be sure to store all your Christmas décor in one space. My designated Christmas tote prevented a lot of unnecessary purchases before we had a basement. My rule was if it couldn’t fit in the tote, I can’t buy it. This rule forced me to be creative with what I already had. Wreaths are the only thing I don’t store in totes. I hang them up on a hanger and cover them with a trash bag. It’s not fancy, but it does the trick! When my Christmas décor is out, I store my unused everyday pieces in the Christmas tote. Now that we have a basement to store things in, I might be adding a few more totes this year ;).
Step 7: Share it!
As always, thank you for following along with me in my creative journey. Be sure to tag me and use #meagannicholedotcom when sharing how you decorate for Christmas! Thanks for stopping by MeaganNichole.com

- How to DIY a Elegant Pearl Balloon Backdrop for a Bridal Shower
- Valentine’s Day Gifts for Kids, Mom and Dad (Simple, Thoughtful Ideas for the Whole Family)
- End Table Decor Ideas That Actually Work in Real Life
- Small Bathroom Makeup Storage Ideas (That Actually Work in Real Life)
- DIY Bathroom Sign Ideas You Can Print at Home
DISCLAIMER: Links included in this description might be affiliate links. If you purchase a product or service with the links that I provide I may receive a small commission. There is no additional charge to you! Thank you for supporting, so I can continue to provide you with free content each week!
Leave a Reply